Pages

Tuesday, June 9, 2015

DIY Personalized Shower Wrap


It's that time of year....school is out and Summer is here, but not before GRADUATION! 
My cousin graduated from High School this past weekend and will head off to college in the Fall. 
I wanted to make her a personalized gift that she'd be able to use in the dorm.  After a little Pinterest search, I saw it.....a shower wrap!  Perfect for a community bath dorm.


After checking out several links and tutorials, I liked this one the best: http://ofdwellinganddress.blogspot.com/2013/04/diy-towel-wrap.html

I won't go through the steps because her tutorial is great, but I did take a few pictures along the way.

The towel I used was a regular bath towel from Walmart in a pretty teal color. 

It was easy to make the elastic casing and I love the extra security that having elastic in back gives.
 
Great Velcro closure:

Rather than use my embroidery machine (it only does 4x4 or smaller), I opted to just free-hand the monogram initial and appliqué it using a zig-zag stitch.  (Funny thing that the tutorial monogram is also a "K".)

For a final feminine touch, I stitched a bow at the top where the wrap closes. 

The finished product:

I think it turned out really cute and my cousin loved it! 

Cost breakdown:
Towel....$3.97
Velcro....from my stash
Elastic....$2.97
Ribbon....$2.97/roll (only used a small piece)
Fabric....from my scrap stash

So, basically, about $10. The gift shop at the hospital where I work has one of these wraps for sale (not really any fancier than the one I made) for over $35!! Crazy, right?

I think I may be making one for myself soon. And, I will definitely be keeping this project in mind for future gifts...great as a swimsuit coverup too. 

Happy Summer!
Julie


Wednesday, June 3, 2015

Our Minecraft Party!

My son turned 13 last week!  Eeeeek! I have a teenager! 

This year instead of a birthday trip, he asked for a party with a few of his best pals....specifically, the handful of boys that play video games together.  We opted to hire a Game Truck for the first two hours of the party. It was terrific! The guys (including my 43 year-old boyfriend) had a lot of fun and the game host was great. 

While the majority of the party, the guys were having a Halo battle in the Game Truck.....inside the house was all Minecraft! 


Thanks to a lot of Pinterest searches (I have a whole board for it.), I was able to come up with some fun Minecraft-themed ideas for the big day.  The boys enjoyed them all. 

I bought the green water bottles at a local Five Below store and had my mother cut the vinyl Creeper faces out on her Cricut. The boys filled them with candy from our themed candy bar before they left the party. 

The little food signs are from the free printables provided by: http://www.beingfibromom.com/minecraft-birthday-party


The great birthday banner is from: http://www.thepartyanimal-blog.org/free-printable-minecraft-party-banner/

As you can see above, we turned the kitchen table into a Minecraft "crafting table" using a roll of brown wrapping paper (leftover from shipping packages) and black electrical tape.  The boys thought this was funny and recognized it right away from the game. 

When it came time to eat, we opted for Creeper Pizza!  Got the idea for the pizzas from: 
http://catchmyparty.com/blog/9-awesome-minecraft-party-activities


There are tons of Minecraft cake ideas out there, but my son liked this idea best.  We constructed our blocks from Jello squares, Rice Krispie Treats, and brownies with green frosting.  The little pig was a free paper folding project I also found on Pinterest.

The best part (I think) was our entryway:

Complete with cardboard torches, it turned out as a terrific entry to the party! We used this as our photo spot and made sure to get the birthday boy (wearing the Steve head) in a photo with each guest. The guests enjoyed the props and posing with the Creeper.  My son and my mother built the Creeper out of boxes and a green plastic tablecloth.


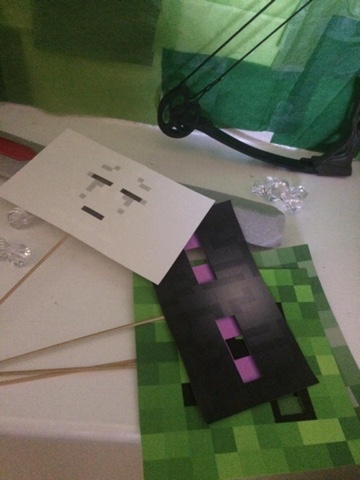
The photo prop masks came from: http://www.madebyaprincessparties.com/2014/11/make-your-own-minecraft-photo-props/


The "diamonds" were leftover from my Tin Can Scarecrow project this past Fall. I scattered them in the entryway nook along with a couple of foam swords, a bow and arrow set, the masks, and a box wrapped and labeled to look like TNT. I constructed the background using tissue paper cut into squares and simply taped to the wall. 


I made the torches using a clothing gift box....the lid for one and the bottom of the box for the other. I wrapped them both in brown paper and added a strip of yellow paper to the top.  I found some red sparkly tissue paper in my stash to use for flames. 

So many ideas and most of them were utilizing things I already had around the house....love that!  We had a great time and created some wonderful memories....and that is what matters!

even did a Creeper manicure!

If you have a Minecrafter in your house, be sure to check out my Pinterest board or the above links for more ideas.

Julie