Wednesday, January 31, 2018

DIY Farmhouse Signs and Other Projects with my Silhouette Cameo

It's been forever since I posted here...life was busy and very different in 2017.  If you've followed along with me, you know that I was diagnosed with breast cancer last January and chose a bilateral mastectomy as treatment.  I'm very blessed to be cancer-free and done with reconstruction...all within one calendar year. 

Needless to say, 2017 was not my best year for getting a lot of projects done. But, while my surgical recoveries didn't allow for a lot of DIY, I did complete a few things...including my bedspring chandelier (many thanks to my teenager for doing the heavy lifting there).

And, once I started feeling more like myself this past Fall, I started playing with my old Silhouette Cameo. Honestly, I never fully appreciated that machine and hardly used it. Well, now that I've finally started playing with it and vinyl crafts, I'm addicted!  Facebook Groups and YouTube have become my new hang-outs.  If you are interested in making some thing..any thing really...there's probably a FB group for that!  :)

One of my first projects was for Christmas when I made farmhouse ornaments.  These turned out really cute and became such a hit when I posted them on FB that I made several sets for customers.  They are simple but look great on the tree. My letters were cut out of Oracal 651 permanent vinyl in black matte.
Farmhouse Ornaments made with white matte
glass ornaments, permanent vinyl, and fun ribbon ties.
Well, these got me started on the Rae Dunn-inspired bandwagon!  I made a couple of snack bowls for myself and new burner covers...also using 651 vinyl and a font called "Paprika".

Dollar Tree burner covers spray painted white and
then lettered with vinyl decals
After that, it was vinyl crafts galore! I really loved how easy it was to make all kinds of things....and I might have gone a little crafting crazy.  But, in my defense, it had been a looooong time between Hobby Lobby sprees and I made most of my Christmas gifts to my family this year.  ;)

I have now used my Cameo in the last few months to:
  • make stencils for wood signs and boxes
  • make custom vinyl pantry labels
  • cut HTV (heat transfer vinyl) to make tshirts, onesies, blankets, and even monogrammed purses
  • cut earrings out of glitter canvas and faux leather
  • cut vinyl for mugs, earrings, dessert carriers, dishware, and "reverse canvas" farmhouse signs
  • cut a stencil used with my wood burner to make a personalized cutting board
.....and there's so much more I haven't even tried yet!

So, if you have something you wanted to try and maybe it didn't work out the first round or maybe you were intimidated by the machine/materials/etc., I encourage you to give it another go!  You might discover a new hobby or appreciation for it after all.  

If you are interested in seeing more of my projects (or visit my soon-to-open FB shop), please follow along or "like" my Facebook page @JuliesCraftyImaginings.

Try something new this week!


Tuesday, October 10, 2017

Upcycled Bed Spring Chandelier

We finally have a light fixture above the dining room table!!  


The previous owner of our house removed the chandelier and patched the ceiling...I was told it was because he put a pool table in the room.  I've wanted to replace the fixture since we moved in 6+ years ago but the cost of an electrician, another person to repair the ceiling, and the light fixture itself kept the project on the "to-do" list.  I also did not want just any ordinary chandelier.  While it hangs over the formal dining table, it is a shared dining/living room.  Having a fancy fixture would not really go along with the rest of the decor, but too casual or too small and I wouldn't be happy with the overall look.

If you've followed me for very long, you know I LOVE a good upcycle project and adore the chance to turn something odd into something pretty!  

For over a year now, I've seen multiple projects made with old bed springs.  I even purchased two antique ones at a show last year...using them as candleholders now.  One booth at the Vintage Market Days was entirely dedicated to bed spring crafts...wreaths, candle holders, Christmas trees, etc.
Last Fall's VMD finds!
On Pinterest, I've seen several lighting projects using old crib springs and mattresses.  I liked the look of the wires and springs and the thought of such a noticeable fixture in the room!  The only problem was where to find an old mattress!?!?!

Then, this Summer, my son's school was cleaning out the gym and someone from the neighborhood threw a few items into the junk pile....one being an old, stripped set of bed springs!!  What?!?!  It was meant to be....at least that's what I told my son when I asked him to load it up after soccer practice!  ;)
Can'y you just see all the projects to be made with this?
I was still recovery from surgery at the time so I wasn't able to get started until this past week.  It only took a day to get in up and then I had to wait until my lights arrived from Amazon a couple of days later to complete it.  I am so happy with how it turned out!

To start, you'll need a good set of bolt cutters.  I broke the tip off of a pair of snips, so just use the bolt cutters upfront and save the hassle of running out to buy a pair like I had to!

Once I cut the mattress down to the size I wanted the fixture to be, I removed all of the clips and extra little stray pieces that were hanging from many of the springs.  I had my son hold the piece up and got an idea of how long we needed the chain to be on each side.

The only chain available at Home Depot that I liked was silver, so I purchased some Rustoleum Spray Paint in a rustic metallic color.  The chain took the spray paint easily and it was a great  match to the bedsprings.  I also painted the "s-hooks" that we used to attach the chain.


My son installed a heavy duty hook into the ceiling. I bought one that was rated for 45-lbs just in case. Once the chain and hooks dried, we took the pieces inside and started playing with the right height.  This is most definitely a two person job!!  My son was the only reason I was able to get this project completed....my upper body strength is not back to normal yet and the overhead work is still tough for me.

Once we figured out the right length for each chain, my son bent the ends of the s-hooks so that the chains would not slip off.  Then, we hung the fixture!  

I liked it immediately. The size was just right.  Earlier in the week, I found these lights at Big Lots for $10/each.  Two strings was perfect.  

The strings are very small with tiny lights and are battery-operated!! I wound them loosely all around the light fixture and secured the battery packs close to the sides so that I can reach them when needed.
Very cool!

I found some battery-operated, remote-controlled bulbs on Amazon that arrived a couple of days later. They complete the look and now I wish I had a remote for the other two strings!


All lit up!

Love it!

What do you think?  Would you hang an old bedspring from your ceiling?  :)
Happy DIY-ing!
Linked to:
http://www.niftythriftythings.com/nifty-thrifty-sunday-303/
https://tatertotsandjello.com/2017/10/best-friday-features-10-6-17.html


Tuesday, May 30, 2017

DIY Chalkboard "Established" Sign & Memo Board


Don't you just love chalkboards?  If you've been to my house (or read some of my previous posts, like this one), you know that I subscribe to the theory that you can never have enough chalkboards!  I use my chalkboard pantry doors for all kinds of things!!  Right now, they have our calendar on one side and a birthday message on the other!

Anyway....I was looking to make a housewarming gift for my newly married cousin.  She is a fan of the "farmhouse" style and I immediately came up with the idea of making them some version of an "established" sign.  After perusing Pinterest for awhile, I just wasn't quite inspired.  One afternoon after school, my son and I ran into the Habitat Store hoping for something to catch my eye.  And, there it was....the pile of cabinet doors!

I picked up this beauty for $1.00!  It appears to be unused...like maybe it was a sample for finishes because it doesn't have holes where hinges were located.  Score!!

After cleaning it up, I knew exactly what it was perfect for.....a chalkboard!!  I still wanted to do the "established" idea so I combined the two.  It became a CHALKBOARD ESTABLISHED SIGN and MEMO BOARD.

Start by taping of the edges and then follow the directions on your chalkboard paint.  Mine suggested two coats, one in one direction and one in the opposite. It also required 24 hours of curing time before prepping with chalk. You could leave it just like this...it makes a simple but pretty chalkboard!

My original plan for the "established sign" was to paint both the large initial and the last name in the center, but after accidentally scratching the surface after the first coat (easily touched-up btw)....I loved the idea of the wood grain showing through!  The easiest way to do this would be to use a vinyl letter, paint over it, and then remove it.  But, I already had painted my door, so I gently scraped the paint off in the shape of my letter.  I added a third coat of chalkboard paint by carefully painting around the letter. After curing for 24 hours, I prepped with chalk.

Then, using chalk to outline my lettering, I filled in the last name with a paint pen.


On the back, I taped a baggie with a piece of chalk and a cloth inside.  I also made a note reminding them NOT to use anything sharp on the painted surface.  Additionally, I used my wood burning tool to put my signature mark on the back and a note of congratulations to the couple.

Two hangers and it was done!

To gift it, I simply tied a pretty ribbon around it and added a few examples of notes they might write on it.


It was an easy and fun project!  Hope you enjoy making your own!

Happy Summer!


This post is linked to:
http://www.creativelylivingblog.com/2017/05/monday-funday-51.html
http://www.niftythriftythings.com/nifty-thrifty-sunday-284/

Friday, April 14, 2017

Delicious (& easy) Chocolate Chip Cheesecake Bars

How many of you watch those recipe videos on Facebook and drool over the food but never make it yourself?  I always think I will, but alas, the posts sit in my "saved" file.

Well, this week, this beauty of a recipe came up as I was scrolling my FB feed....Chocolate Chip Cookie Cheesecake Bars!!  I mean, seriously??!!??  It just so happened that I was online ordering my groceries for pick-up....meant to be. Ordered the ingredients I needed and that was that. I only have a couple of days more on leave from surgery and I'm feeling strong enough to do more, so perfect timing!

The recipe was everything it promised....so good and easy!  You can find the video here:
http://www.cookingpanda.com/video/food/2016/08/30/chocolate-chip-cheesecake-bar


This would make a great treat for your Easter celebrations this weekend too!
Enjoy!

Saturday, February 18, 2017

A Lump in the Road

Life has taken a bit of a detour for me of late....a bump...or lump in this case...in the road.

A month ago today, a "highly concerning" lump was found in my left breast. After biopsy, it was found to be Stage 0 DCIS.....the best of the worst diagnosis. After much prayer and consultation, I'm scheduled for a bilateral mastectomy and reconstruction in 2 weeks.  Obviously, my crafting and DIY posts and projects will be a bit limited for awhile.

However, I'm still around....and I'll have plenty of time stuck at home in bed to plan some new projects!!

If you or anyone you know might find it helpful to read about my breast cancer journey, tips and hints along the way, etc., please come see me at It's a Bosom Thing @ www.bosomthing.blogspot.com

Monday, February 13, 2017

DIY Hand Towel Bib

If you have or have had little ones, you know how important bibs are, right?  My favorite one when my T was little was a terrycloth one made to slip over his head.  Other folks apparently love these too because there are tons of tutorials online to show you how to make them.

I won't go into major details today (like measurements) because if you need that, it's a quick Pinterest search away (see the link below for a great tutorial from Vanilla Joy).  But, I will show you how I made one of these awesome bibs...the really easy way!

I started off with a regular hand towel purchased at my local Walmart.  I found this pretty hot pink color...perfect for the little princess I was making it for!

I wanted this bib to last a long time for her so I chose NOT to cut the towel down in size.  And, instead of folding directly in half, I folded about 2/3 or 3/4??  See pic below:

I used the CD trick that was suggested in Vanilla Joy's tutorial for dishtowel bibs....it was perfect for the neckline!

Since I didn't have any ribbed knitting for the neck, I first started out using a neck from an old t-shirt.  But, it just didn't look right...seemed too thin.  Then, inspiration hit!  In my stash was an extra baby headband that was purchased to make baby tu-tus last year.  

I pinned the heck out of it (not a big fan of sewing in circles).....and it was perfect!  After attaching the band, be sure to topstitch on the outside (making sure the inside seam is down).

New neckline done!  Super easy and it's so stretchy and feminine.

Since this is for my primary NICU patient, I wanted to do something cute and fun for her family to remember us. (Applique and embroidery done with my Brother SE-400.)


My "baby" at home is 14 years old now, so I had to use a stuffed kangaroo as a model.... :)

This was a fun and easy project that you can customize and personalize as much or as little as you want.  Wouldn't these make super cute and useful gifts?

If you make some, post your pics in the comments.

Have a great week!

Wednesday, December 7, 2016

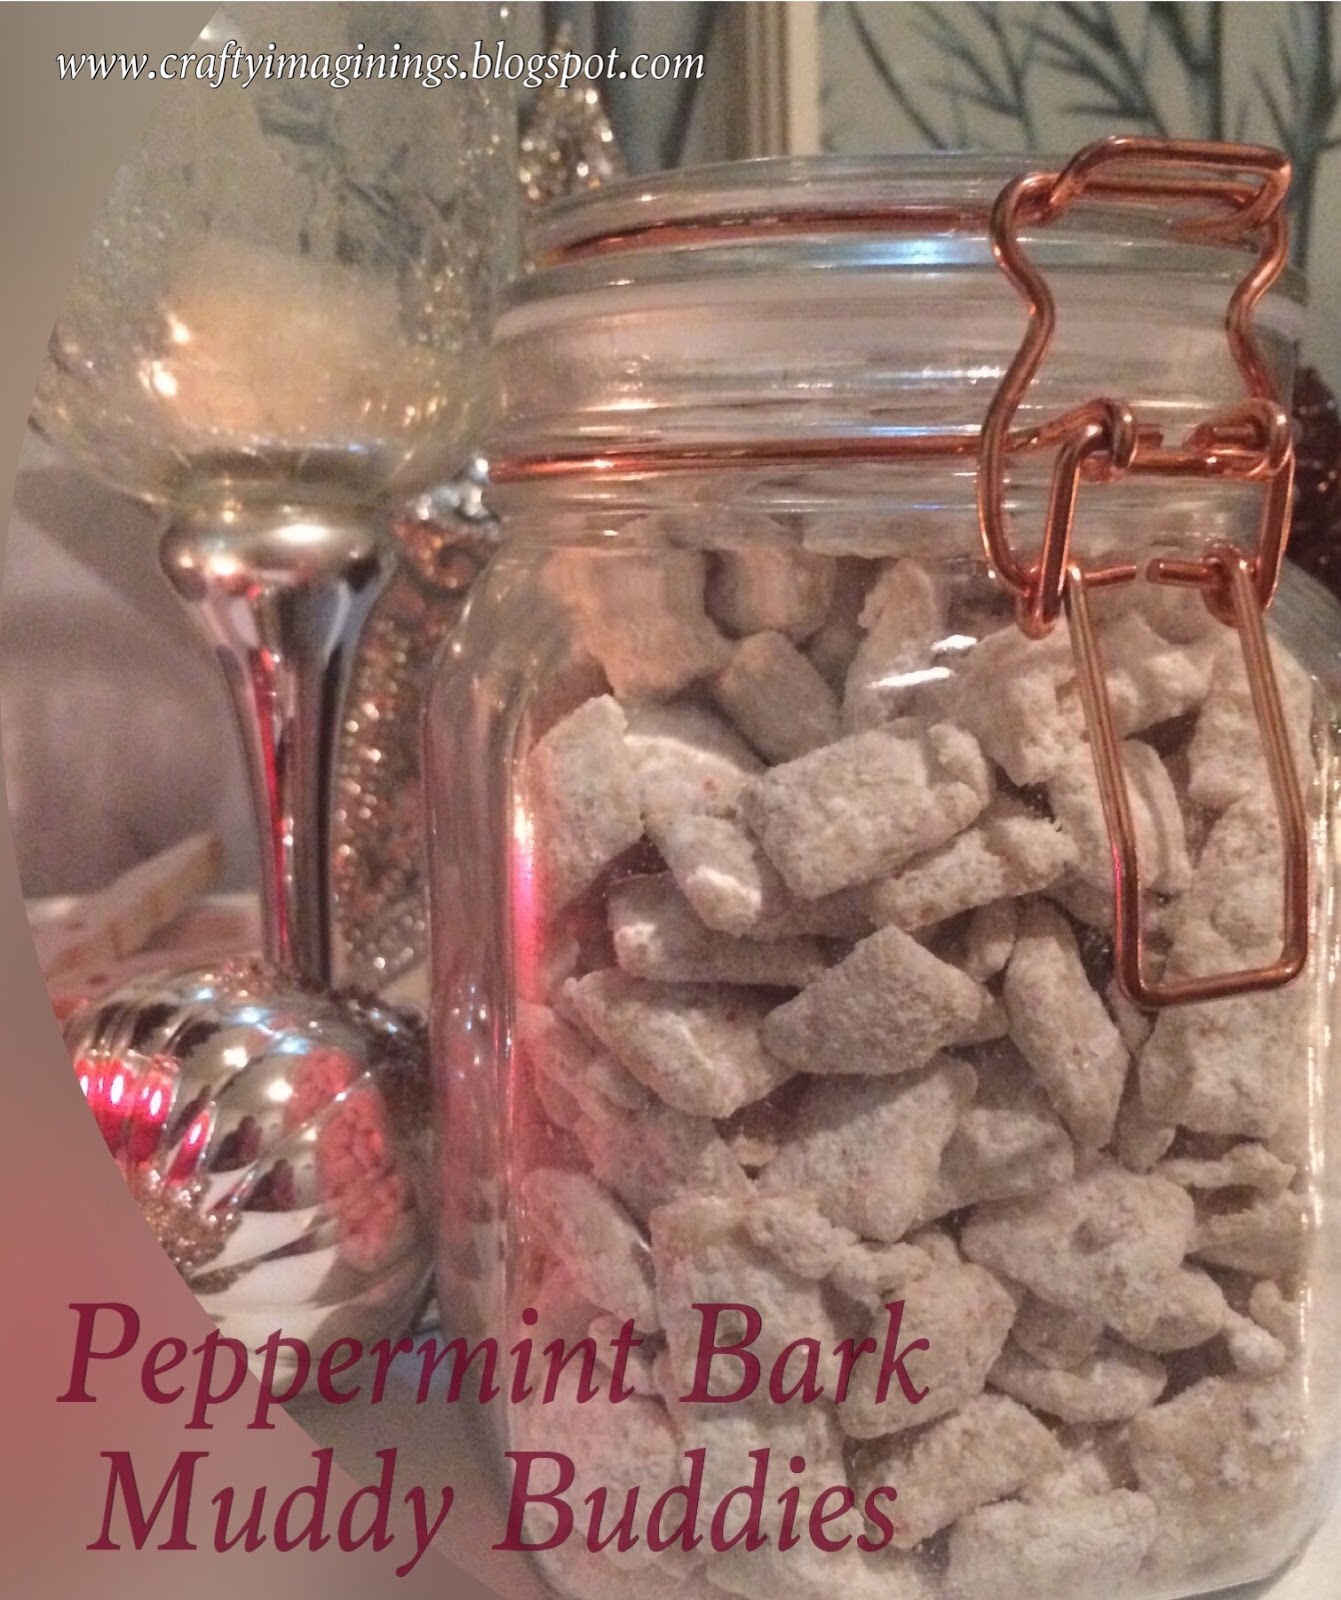
Peppermint Bark Muddy Buddy Chex Mix COPYCAT Recipe


If you haven't experienced the delicious treat that is Chex Mix Peppermint Bark Muddy Buddies....you have missed out!!  I love all things peppermint and look forward to trying the new fun snacks and items that come out this time of year.

A few years ago, I stumbled upon this bag of sweetness at Target....and I was hooked!
Each year, I make a special trip to the Christmas aisles of Target in search of a bag...okay, several bags. This year, however, it WASN'T THERE!!  What??!!??  After a fruitless search, I went online and even Amazon said "unsure if this item will be available".  Ugh.

A holiday season without my favorite treat??  It couldn't happen, so I scoured Pinterest for recipes.  There are plenty.  BUT, do not be misled.....while the recipes may be yummy, many of them didn't even look like the Chex brand version.  Some of the recipes have pieces of peppermint bark in them, others include chopped candy canes, and then there are some that do not even have powdered sugar....gotta have that!

I finally decided I was going to try one I thought looked and sounded closest to the original simple store-bought version but then.....I saw these bags of candy Cane Wilton Candy Melts at Walmart today!


It seemed too easy....but, not only is this a super easy recipe, it tastes just like the original!
Easy and tasty...can't beat that!


5 cups Rice Chex cereal
1 bag (10 oz) Wilton Peppermint Candy Melts
1 cup powdered sugar (add extra if you need it...can't go wrong here!)

Melt your candy melts in the microwave or on the stovetop and pour over the cereal. Be sure to mix it gently but thoroughly so that all the cereal pieces are covered.  Then pour on the powdered sugar and mix well again.  Let it sit for a few minutes to cool completely and then try to keep from eating the whole bowl!  

Enjoy!